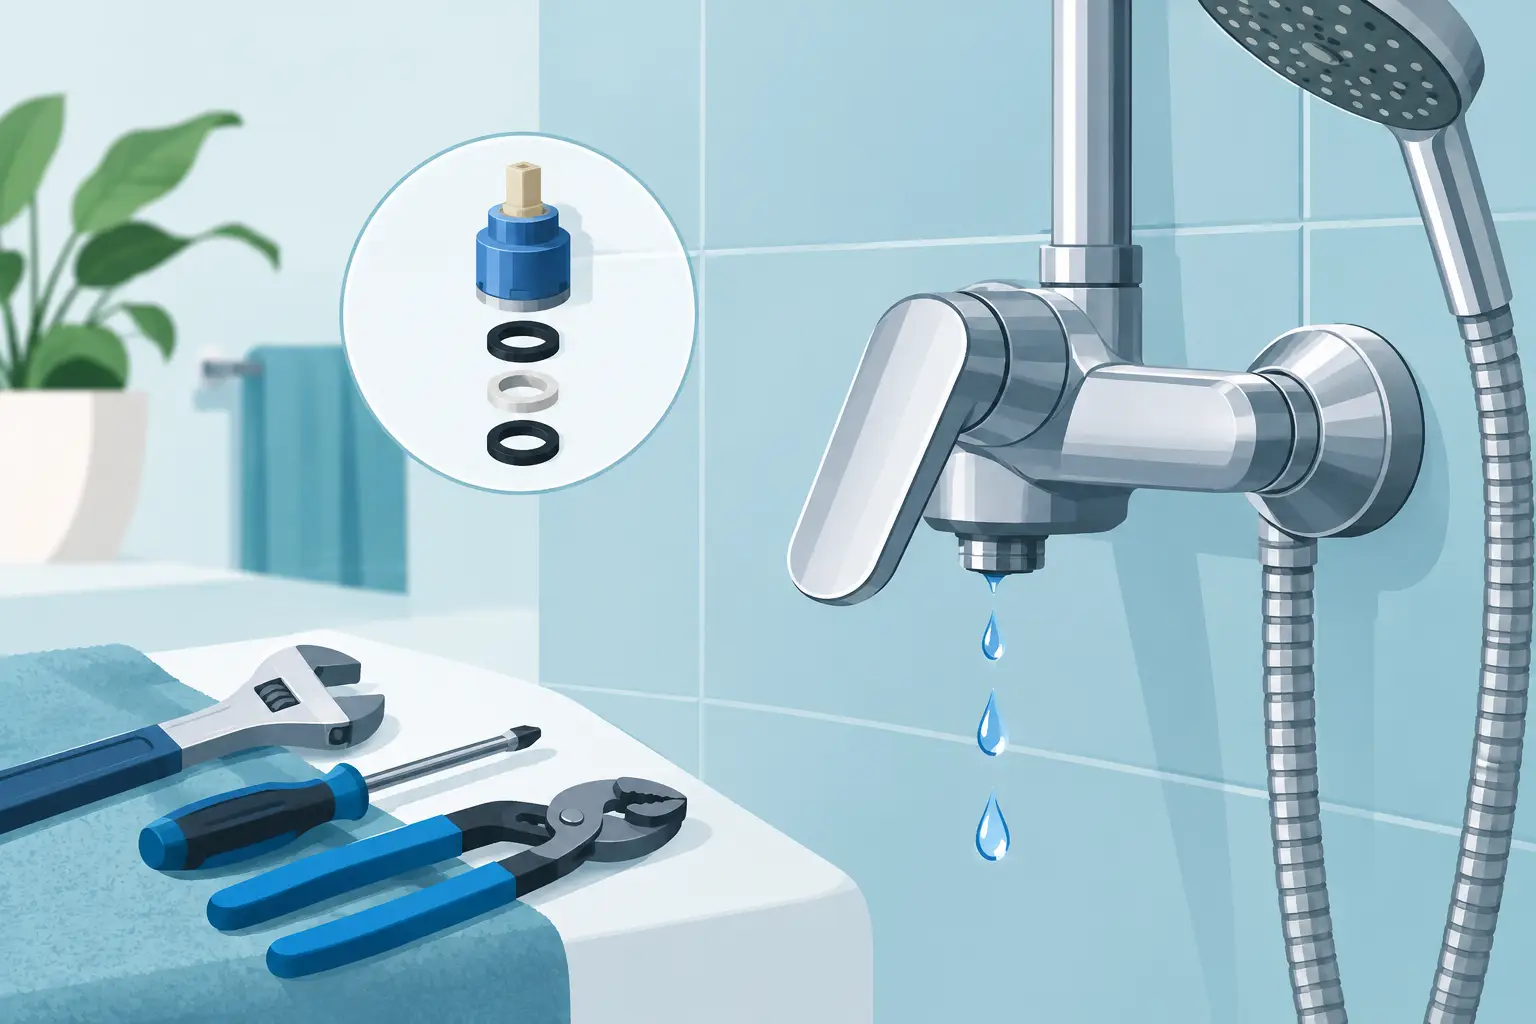
A shower tap that drips once every few seconds looks minor, but it is rarely a problem worth ignoring. In a Singapore HDB flat or Condo unit, constant water exposure can stain tiles, encourage mould around the shower area and add needlessly to your water bill. If you want to fix dripping shower tap issues properly, the first job is identifying what type of tap you have and where the water is actually escaping.
A worn internal washer is a common cause, but it is not the only one. Modern shower mixers, concealed valves and diverter sets use cartridges, O-rings and ceramic discs that require a different repair approach. Replacing the wrong part can turn a simple fix into a loose handle, damaged fitting or a shower that cannot be shut off.
First, identify where the shower tap is dripping
Do not assume every shower leak comes from the tap outlet. Dry the area with a cloth, leave the shower unused for a few minutes, then inspect it closely. Water dripping from the shower head after the tap is turned off usually points to a valve or cartridge issue. Water emerging behind the handle, from the wall plate or down the side of the fitting may indicate a worn seal, loose connection or concealed pipework concern.
A shower head can also hold a small amount of water after use. A few drops for a minute or two are normally harmless. A steady drip that continues for hours is not. That is water passing through a tap mechanism that is no longer sealing fully.
In many older HDB bathrooms, you may find separate hot and cold water taps with traditional turning handles. These often use rubber washers. In newer BTO flats and renovated Condo units, single-lever mixer taps are more common. These usually contain a cartridge, not a simple washer.
Before you fix a dripping shower tap, isolate the water
Never dismantle a shower tap while the water supply is live. Look for the bathroom isolation valves, often located near the water heater, beneath a basin cabinet, or within an accessible service area. If there are no local valves, close the main stopcock for the unit.
Open the shower tap afterwards to release remaining pressure, then plug the floor trap with a cloth. Small screws, clips and cartridge retaining nuts can disappear into a floor trap very quickly. Put a towel over the shower floor as well, especially if you have glazed tiles that can chip when tools or tap handles are dropped.
If your shower is connected to an instant water heater, switch off the electrical supply before working around the fitting. Water and electrical equipment should never be treated casually. If you see wet wiring, rust around the heater connections or water marks below the heater, stop and arrange a professional inspection.
Traditional shower taps: check the washer and valve seat
For a conventional two-handle shower tap, remove the decorative cap on the handle and undo the screw beneath it. Pull off the handle, then use a suitable spanner to remove the valve headwork. Place a cloth between the spanner and chrome fitting to reduce the chance of scratching the surface.
At the bottom of the valve headwork, you will normally find a rubber washer secured by a small screw. If it has become flattened, cracked, hardened or uneven, replace it with a matching size. Taking the old washer to a hardware shop is often the safest way to get the correct replacement. A washer that is slightly too small or too thick may not seal properly.
Also inspect the valve seat inside the tap body. This is the surface the washer presses against when you turn the tap off. If it is heavily pitted or corroded, a new washer alone may only provide a short-term improvement. The seat may need resurfacing or the valve headwork may need replacing.
Do not overtighten the tap once reassembled. Many washers fail early because someone keeps forcing the handle tighter to stop a drip. Close it firmly, not aggressively.
When an old shower tap is better replaced
If the handle is stiff, the spindle is badly worn, the chrome body is corroded, or replacement parts are no longer available, repair may not be worthwhile. This is particularly true where older fittings have been installed directly into tiled walls and the thread condition is uncertain.
A straightforward tap replacement can be cheaper than repeated call-outs for the same leaking mechanism. However, replacement must be selected carefully. The new fitting has to match the existing pipe centres, connection type and wall condition. Forcing an unsuitable tap onto ageing concealed pipe connections risks a much more expensive leak behind the wall.
Mixer shower taps need a cartridge inspection
A single-lever mixer shower tap usually controls water flow and temperature through an internal cartridge. When that cartridge wears out, you may notice dripping from the shower head, a lever that feels loose, poor temperature control, or water continuing to run even when the handle is fully closed.
Remove the handle according to the tap design, which may involve a hidden grub screw beneath the lever or behind a small cover. Once the trim plate is off, you should see a retaining nut or clip holding the cartridge in place. Take clear photos before removing anything. Cartridge sizes, stem shapes and locating tabs differ significantly between brands.
If the cartridge is visibly cracked, clogged with debris or difficult to move, replace it with an exact match. Generic cartridges can look almost identical but still fail to seat correctly. If you cannot identify the brand or source the right part, do not force a substitute into the valve body.
For concealed mixers, be especially careful. The valve body sits inside the wall, often behind tiles. A damaged retaining nut, cross-threaded cartridge or broken internal component may require access work that is far beyond a simple surface repair. In that situation, it is cheaper to stop before damage spreads.
Check the shower head and hose too
Sometimes the tap itself is fine, but the shower set is creating confusion. A leaking hose connection, worn rubber washer inside the hose nut or cracked shower head can leave the wall and floor wet after every use. Unscrew the hose gently and check the small rubber washers at both ends.
Limescale and sediment can also affect the shower head. Singapore’s water supply is generally treated, but scale and debris still build up over time, especially in older fittings. Soaking a removable shower head in a suitable descaling solution can improve spray flow. It will not fix a drip caused by a faulty tap valve, but it can prevent you from replacing the wrong component.
Do not ignore water marks outside the shower area
A dripping shower tap becomes more urgent when you see peeling paint, swollen skirting, damp patches on the opposite wall or a ceiling stain in the unit below. In HDB and Condo buildings, the source is not always obvious. Water can travel along pipe sleeves, tile gaps and concrete surfaces before appearing elsewhere.
For Condo owners, inform the MCST promptly if there is possible common pipework involvement or water affecting another unit. For HDB residents, responsibility depends on whether the fault lies within your flat’s sanitary fittings or relates to common property. A leaking shower fitting inside your bathroom is generally an owner repair, while wider pipework questions may need assessment before anyone starts hacking tiles.
Do not cover cracks or water marks with sealant and hope for the best. Silicone can stop superficial splash water at an edge, but it cannot repair a failed cartridge, loose pipe connection or concealed leak. A proper diagnosis saves far more than repeated patching.
When to call a handyman or plumber
A confident homeowner can replace a visible washer or shower hose washer. Call for help when the tap is concealed, the cartridge cannot be identified, the handle is seized, or there is any sign of water behind tiles. The same applies if isolating the water supply is difficult, the fitting is connected close to an electrical water heater, or you are managing a tenant handover and need the job completed quickly.
HRD Professional Handyman can assess shower tap leaks across Singapore, explain whether a targeted part replacement is sensible, and give clear upfront pricing before work starts. There is no benefit in replacing a full shower set if a compatible cartridge or valve headwork will solve the problem safely.
Send photos for a clear repair quote
Take a photo of the full shower tap, a close-up of the handle and a short video showing where the drip appears. If you know whether it is an HDB flat, Condo unit or landed property, include that too. Send them by WhatsApp for a fast, transparent assessment and quote.
A small drip is easiest and cheapest to deal with before it becomes mould, damaged cabinetry outside the bathroom, or a complaint from the neighbour below.

0 Comments