A tile that clicks, rocks underfoot or sounds hollow is not a small cosmetic nuisance. Left alone, it can crack under a chair leg, allow water below the finish, or become a trip hazard for children and older family members. The good news is that you can often fix loose floor tiles without replacing an entire HDB flat or Condo unit floor – but only if the cause is correctly identified first.
In Singapore, loose tiles are commonly linked to water seepage, ageing tile adhesive, movement in the screed beneath the tile, and poor original installation. A rapid, targeted repair is usually far better value than allowing one loose tile to turn into a broken cluster and a larger hacking job.
Why floor tiles come loose in Singapore homes
The tile itself is rarely the real problem. What matters is what has failed underneath it.
In bathrooms and kitchens, a leaking water tap, worn silicone joint, damaged grout line or concealed pipe leak may let water travel below the tiles. Moisture can weaken the adhesive bed and cause tiles to debond. This is especially common near shower areas, washing machines, kitchen sinks and toilet bowls.
In older HDB flats, the screed below the tiles may have deteriorated or separated over time. In newer BTO units, hollow or loose tiles can also appear during the defects period because the adhesive did not achieve full contact during installation. Temperature changes, building movement and heavy impact can worsen a weak bond.
A hollow sound does not always mean a tile will lift immediately. Many tiled floors have isolated hollow spots that remain stable for years. The repair becomes urgent when the tile moves, cracks, grout repeatedly breaks away, or there is any sign of dampness around it.
Check whether the tile is loose or just hollow
Start with a simple check. Press gently on each corner of the affected tile while wearing shoes. If it rocks, clicks, sinks slightly or pushes grout dust out of the joints, it has likely lost its bond and needs attention.
Next, tap the tile lightly with the handle of a screwdriver or another hard plastic tool. A firmly bonded tile produces a sharper, solid sound. A hollow tile sounds more echoing. Compare it with surrounding tiles rather than judging one sound in isolation.
Look closely at the grout lines. Fine cracks around all four sides, dark staining, loose grout, or a tile sitting higher than its neighbours are stronger warning signs than a hollow sound alone. In a bathroom, also check whether water pools in that area after showering. A poor floor fall can keep water at the joints and accelerate failure.
Do not keep stamping on the tile to test it. A tile that is already partially detached can crack suddenly, leaving sharp edges and making a simple re-bonding job more expensive.
How to fix loose floor tiles safely
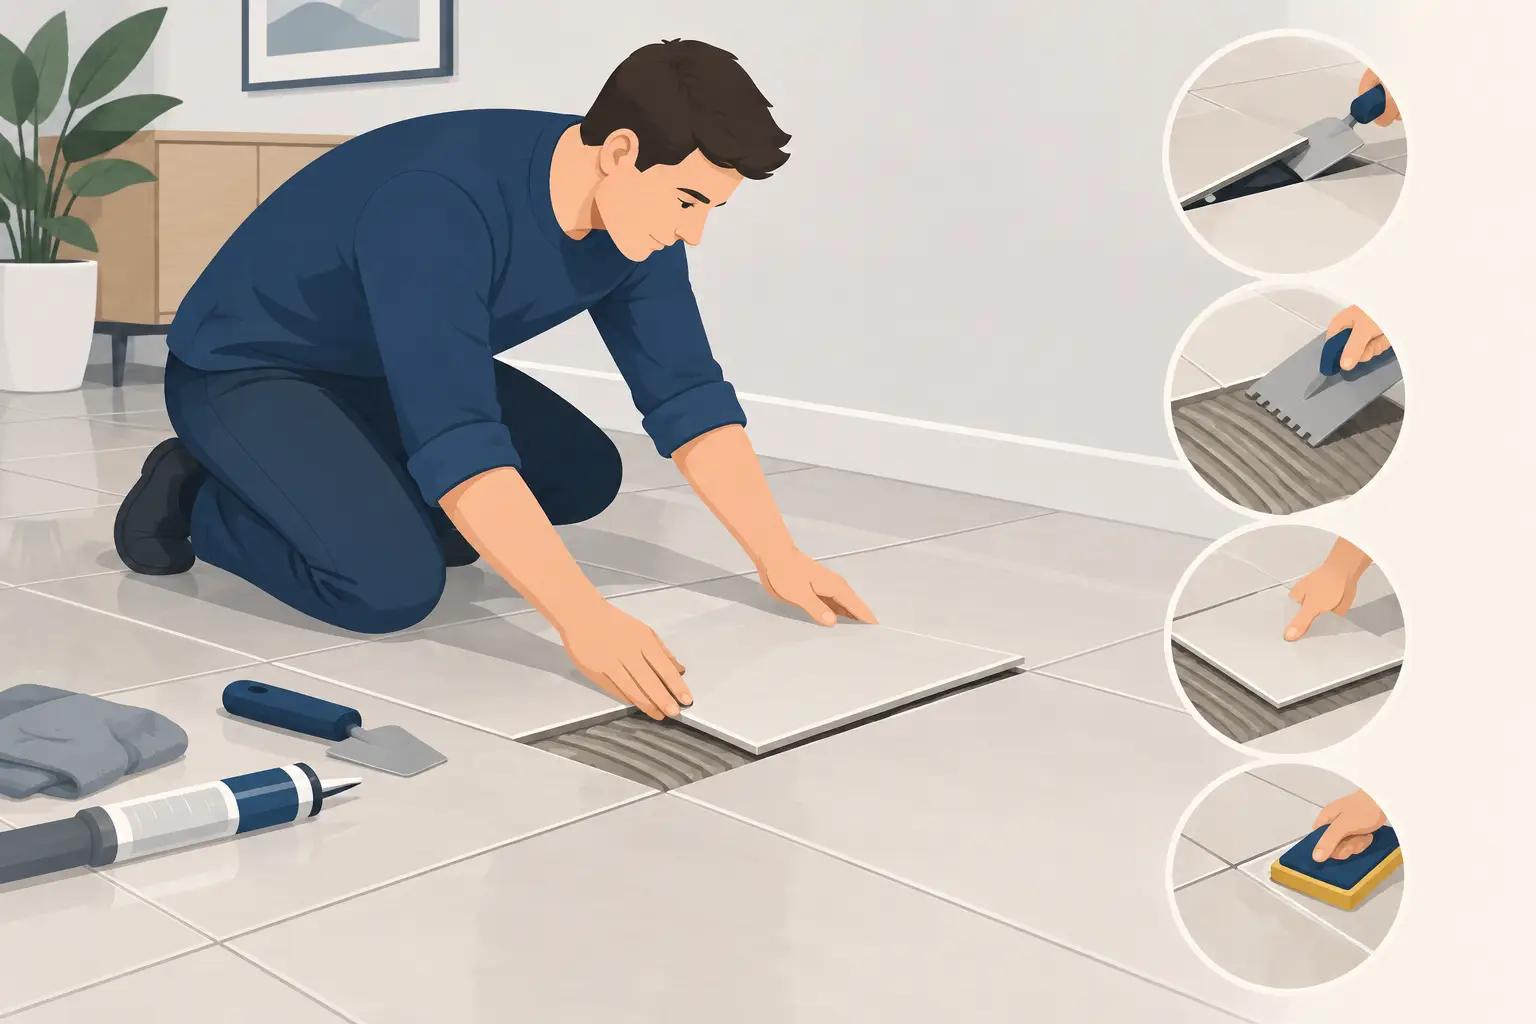
A single loose tile with no active water problem can often be repaired cleanly. The main work is not forcing it back into place. It is removing failed adhesive, preparing a stable base and restoring the joint properly.
First, rule out active water damage
Before any tile repair, make sure the area is dry and the water source is controlled. If the tile is beside a shower, kitchen sink, washing machine or toilet, inspect for leaks first. Reattaching a tile over an ongoing leak only hides the problem for a short time.
For kitchen floors, check the base of the sink cabinet as well. A slow pipe leak can damage the cabinet plinth and travel along the floor edge before becoming visible. Repairing the leak and only the affected cabinet section is often far more sensible than replacing a full kitchen cabinet run.
Remove the loose tile without damaging its neighbours
If the tile can be saved, carefully rake out the grout around its perimeter first. This separates it from adjacent tiles and reduces the risk of chipping them when lifting it.
A professional will normally work from the loosest edge with a thin scraper or suitable chisel, applying controlled pressure. Avoid using excessive force or a large hammer. On older tiles, replacements may no longer be available, so preserving the original piece can save considerable trouble.
If the tile breaks during removal, keep the pieces. They may help identify the tile size, thickness, finish and colour when sourcing a replacement. Tile shade can vary noticeably between batches, even when the printed product name looks the same.
Prepare the substrate properly
This is where rushed repairs fail. All loose adhesive must be removed from both the back of the tile and the floor base. The substrate needs to be sound, clean, dry and reasonably level before new adhesive is applied.
If the screed is powdery, damp, cracked or crumbling, adhesive alone is not a lasting repair. The affected base may need to be stabilised and levelled before the tile is reset. Where a bathroom waterproofing issue is suspected, do not simply patch the surface. The repair scope depends on whether water is entering only through failed grout or from a deeper waterproofing failure.
Reset, align and grout the tile
Use an appropriate tile adhesive, not general-purpose glue, silicone or cement mixed by guesswork. The tile must be bedded evenly so it sits flush with neighbouring tiles and has proper support beneath it. Voids below a tile make it more likely to crack when someone steps on it.
Once the adhesive has cured according to the product requirements, grout the joints and seal any edge where the floor meets a sanitary fitting or wall if that joint requires flexible sealant. Keep the area dry during curing. In a household bathroom, that may mean planning the repair around family routines rather than rushing use of the shower.
When injection repair may work – and when it will not
For some hollow tiles that are intact and stable, an adhesive injection method can be considered. Small holes are drilled through selected grout lines or the tile surface, and a low-viscosity bonding material is introduced beneath the tile.
This can reduce disruption because the tile is not removed. It is useful where matching replacement tiles are unavailable and the debonded area is limited. However, injection is not a cure for every hollow tile. It will not solve a wet substrate, damaged screed, active pipe leak, badly cracked tile or failed waterproofing membrane.
Be wary of anyone promising to inject an entire bathroom floor without checking moisture, movement and the condition of the grout. A cheap fix that traps moisture below the tiles can create a more difficult problem later.
When to call a handyman instead of attempting DIY
DIY may be reasonable for one accessible tile in a dry area, provided you have a spare tile and can allow enough curing time. It becomes less suitable when the tile is near plumbing, when several tiles are loose, or when the floor feels uneven.
Call for an assessment promptly if you notice any of the following:
- Loose tiles spreading across a bathroom or kitchen floor
- Cracked tiles with sharp edges or raised corners
- Damp marks, mouldy smells or soft cabinet panels near the affected area
- Water appearing from grout lines after showering or mopping
- Repeated grout cracking around the same tiles
- A suspected concealed leak below the floor
For Condo units, check MCST rules before noisy hacking work or arranging contractor access. Management may require a renovation deposit, approved working hours or protective covering in common areas. In an HDB flat, internal floor tile repairs are generally the owner’s responsibility, while common-area defects and external issues may fall under different parties. If you are a tenant, inform the landlord or agent with clear photos before authorising work, especially where water damage is involved.
A targeted repair costs less than waiting
The lowest-cost repair is usually the one done before the tile cracks and water reaches other finishes. One loose kitchen tile can be reset. A prolonged leak beneath a kitchen cabinet can mean swollen boards, damaged plinths, mould and a much wider repair.
HRD Professional Handyman assesses the actual failed area and recommends only the necessary work. If one or two tiles can be lifted, prepared and reset, there is no reason to push a full flooring replacement. If the cause is water damage, the leak and affected materials need to be addressed honestly before cosmetic repairs begin.
Take clear photos of the tile, surrounding grout lines and any nearby water source. Send them by WhatsApp for a fast, transparent quote and advice on whether the floor needs a simple tile reset, leak investigation or a more careful repair. Acting while the problem is still localised protects your flooring, your budget and your home downtime.


0 Comments